To begin with, we created an empty game object. With the empty selected, we opened the component menue and assigned the object an 'Ellipsoid Particle Emitter,' a 'Particle Animator,' and a 'Particle Renderer.' In the materials menu under the Particle renderer, we selected the fairy dust element. This creates a rather generic white particle system which is useful as a starting point for experimentation. Under the particle emitter settings, the maximum and minimum size of the particles can be altered, as well as the x, y and z coordinates of the elliptical cloud which is generated. The minimum and maximum energy determines the duration of each particle before it fades away. By adding a 'World Force,' which creates a force that determines which way the particles are pushed no an axis when spawning, can be used to create an upward motion like for example fire. To add further realism, the random axis option pushes some particles slightly off axis, giving the particle effect a more natural body. If we wanted to apply this effect to say; a jetpack, the local velocity causes particles to act in relation to a parented object.
the 'Tangent Velocity' option, pushes the particles out on an axis, creating possibly an explosion effect. To add even further realism, the 'Angular Velocity' settings can be sued to add rotation to the particles, again making them seem more natural. Also, using the particle animator, you have the option of making the particles fade through a range of colours during their lifespan. By adding a red to yellow gradient, an effective flame illusion can be created. Bellow is a particle system showing fire embers which I created while experimenting in unity. It gives an idea of a particle system can be manipulated to achieve hopefully realistic results:
Original 'fairy dust' particle system.

Fire ember effect.
Another useful tool is the 'World Rotation Axis' option. As the name states, the settings cause the particle system to spin around an axis, which could be useful for say a distant solar system. The size grow tool causes the particles to expand through their life, which could be very handy if an large explosion is required. On top of this, we sampled a preset waterfall simulator, and used the trail render setting, where the movement of an object creates a 'Tron'-esque light trail along its path.
Waterfall Preset.

Trail Render.
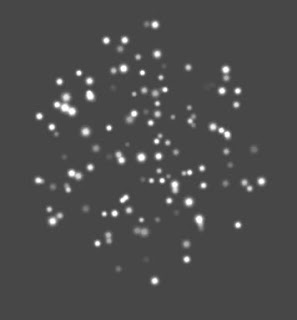
We also created our own particle systems. We first looked at setting up our photoshop document specifically for working with computer graphics. We learned it is important to have the colour mode set to RGB, the resolution set to 72, and the height and width both divisible by 2. The units should also be set to pixels. To animate our particles we set created our image to be used as a sequence. We first began by creating a 512 by 512 photoshop document. We then divided this into a three by three grid. For my particle effect, I wanted to simulate flying birds in the distance. I created a quick animation sequence, selected the pixels and then created a new alpha channel. I then saved my image as a Targa file, 32 bit because of the transparency. The next stage was to create a new material in Unity, and in the shader menu select, 'Particles' > 'Additive.' We then created our empty game object to be used as a particle emitter, following the same steps as when creating the fairy dust. By changing the 'UV Animation' settings under the 'Particle renderer' to 'X Tile: 3' and 'Y Tile: 3,' each particle moved through the individual tiles of the image sequence, resulting in an animation. Unfortunately, this process was only briefly touched on towards the end of our tutorial session, meaning I again encountered problems which I am not yet sure how to amend. The black bird silhouette in my image sequence came out transparent, meaning the only images left in my particle emitter where unintentional white outlines. I did plan on amending this white outline but instead left it so that my animation could still be viewed for the time being. Obviously the use of black for my animation caused confusion when working with alpha channels. This is something will have to consider, as well as revisiting the cause of the white outline when exporting images with transparent backgrounds. Nevertheless, here is the custom particle system I managed to produce:

At the moment, I am still trying to get to grips with some of the features in Unity. Hopefully, some of the processes that I have fell behind on, will re-emerge over the production of my game level. This will mean I will have to troubleshoot the problems in order to gain a better overall understanding of the tools and capabilities of Unity. Perhaps this module will also help improve my Photoshop abilities, and my knowledge of working with Alpha channels and digital graphics in general.
No comments:
Post a Comment